| The BRC cameras can be set to 16:9 (wide) or 4:3 (normal) with the infra-red remote, but in most councils, the camera menu cannot be seen from the chambers. For this reason, we have used special camera control software for doing the setting from the Toaster computer. The software was only developed to the point of "getting the job done", and was never intended for easy operation. This page is here in case intervention is needed by someone not familiar with this software. |
| BEFORE YOU START, you may want to turn on all of the cameras by starting the usual camera controls. Right-click the "M" and look at the configuration. Un-check "Power off cameras when close", and exit the software (right-click the "M" and choose close. This will close the software, but leave the cameras on. The camera control software MUST BE EXITED, as it ties up the ports we want to use. |
|
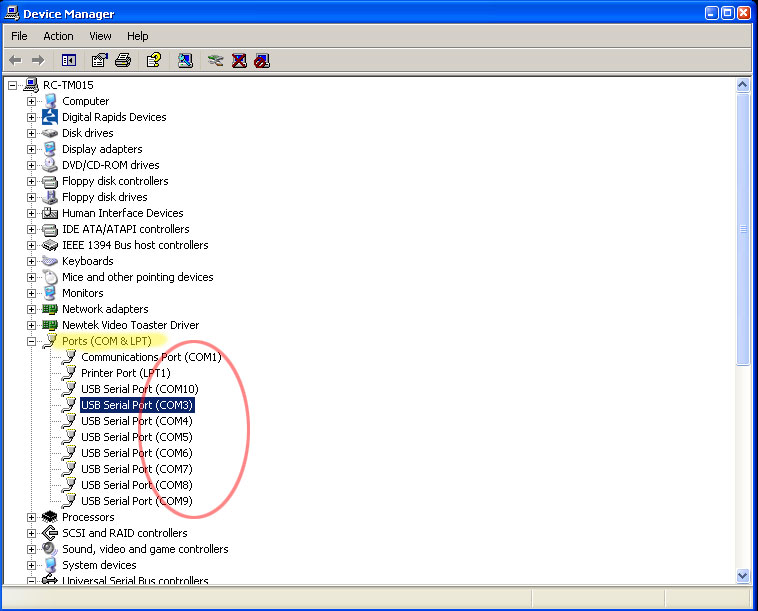 |
Now, check Device Manager to see if the ports are all
A-OK. If the toaster is normal, and healthy, there will be a COM 1,
COM3, all the way to COM10. Note that there is likely NO
COM 2.
Our list is going to refer to the ports in order STARTING AT ZERO. So, COM 1 is zero, COM 3 is 1, etc. If there is a COM 2, then COM 3 becomes 2 in out list. COM's one and two are legacy serial ports on the motherboard. Our camera ports are THREE through TEN. Only a system with eight cameras will use all of them, but they will be there.
|
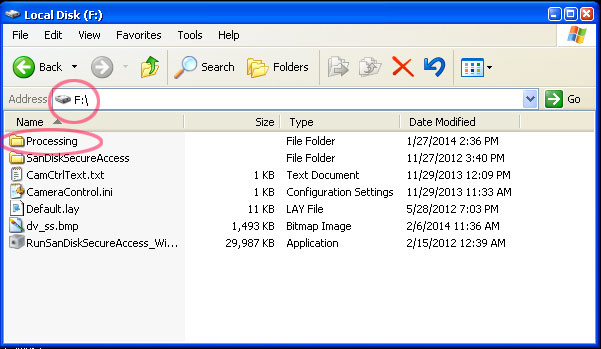
| The software program we need is called
"Processing". It is found in the root of the C drive, if we
have installed it. The screenshot at the right is on drive F: a flash
drive. Yours hopefully will be on C:
|
 |
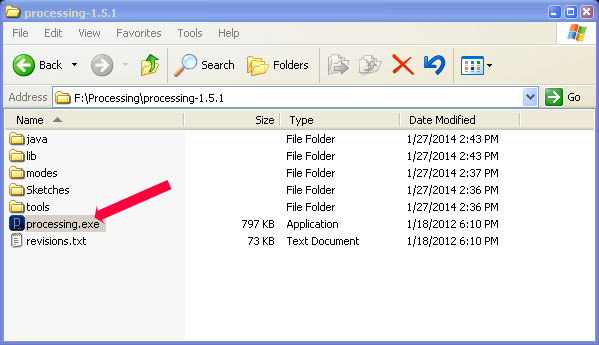 |
Drill down in the Processing folder until you find "processing.exe", and double-click it. |
| The language environment will open. Note the start and stop buttons. Processing calls it's programs "Sketches". Under the File menu, select "Open". | 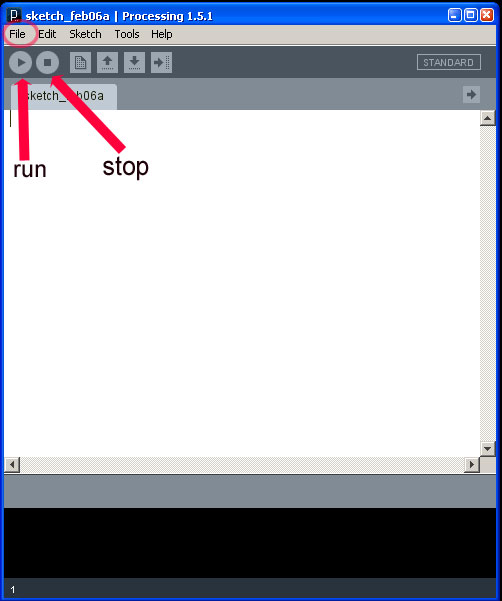 |
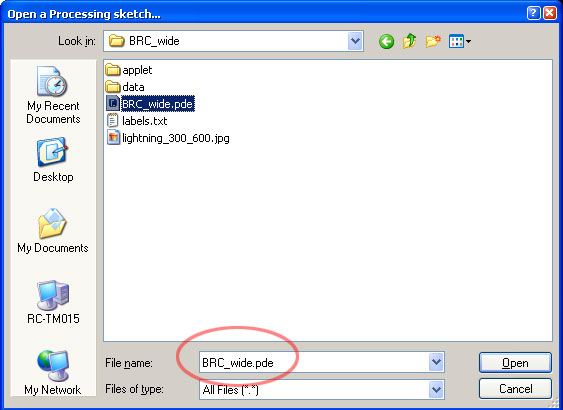 |
You may have to drill down through the Processing folder
to find the sketch, or it may be right there, depending on the previous
use. The path is likely C: processing -> processing
1.51-> sketches ->
BRC_wide ->BRC-wide.pde
Open it.
|
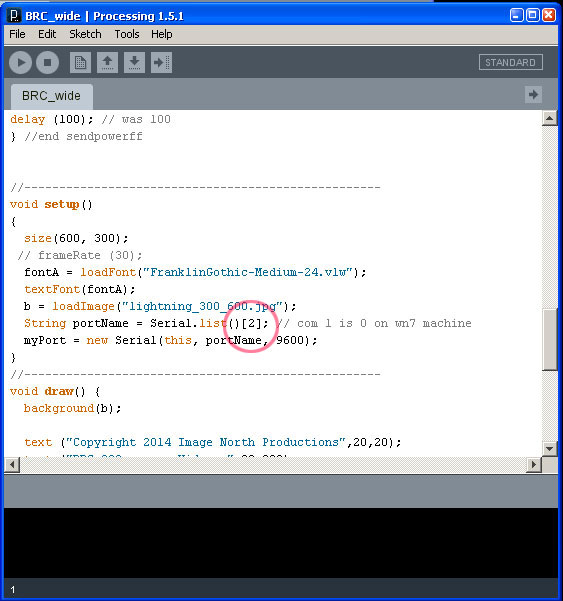
| Scroll to the part of the program called SETUP ( void
setup ). You can use the program's search function to find setup, as it
only occurs once.
The number in the square brackets [x] after Serial.list is the port number, "2" in the screenshot. If there is just a COM1 on the machine (serial.list ZERO), serial.list[1] will be camera 1. If there happens to also be a COM2 on the motherboard, camera ONE will be serial.list[2]. The numbers will go sequentially up from camera one, usually 1,2,3,4, etc. but not necessasarily. Change the number to the camera you want to affect, and run the software, by clicking the run arrow at the top of the window. |
 |
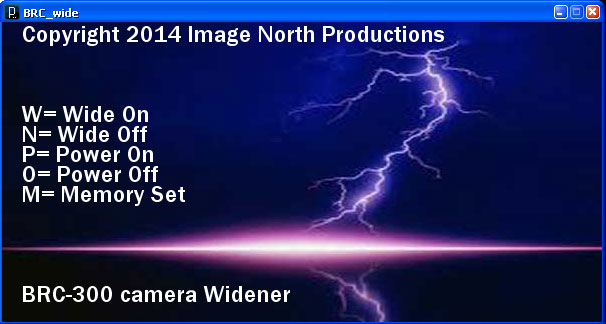 |
The options are clear. We usually toggle between wide and
wide off to see that we are in communication with the camera. Then
choose the mode you want and hit "M" for
Memory Set. On the camera's monitor "Preset 1 OK"
should flash. The camera always powers on to the settings in its preset
one, so this makes your change permanent.
To proceed, kill the program run with "Esc", the red X in the upper right, or the stop button on the previous window. Continue to change serial.list[] numbers to access the other cameras. |
| Remember to set the cameras to power off in the usual camera control software. | 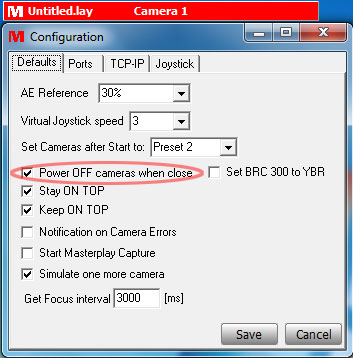 |